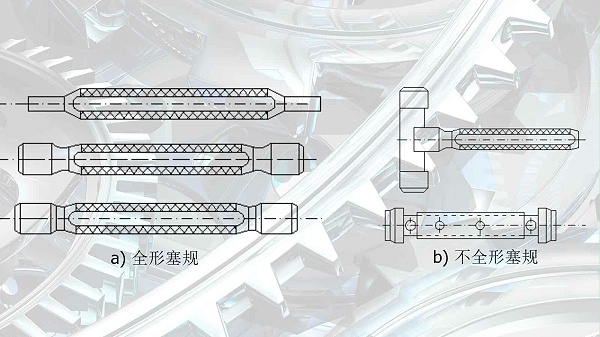
When testing a workpiece with a smooth limit gauge, the gauge that conforms to the Taylor principle is as follows:
The "pass gauge" is used to control the working size of the workpiece, and its measuring surface should theoretically have a complete surface corresponding to the hole or shaft (that is, a full-shape gauge), whose size is equal to the maximum physical size of the hole or shaft, and the gauge length is equal to the matching length.
The "stop gauge" is used to control the actual size of the workpiece, and its measuring surface should theoretically be point-like (i.e. incomplete gauge), and its size is equal to the minimum physical size of the hole or shaft.

In practical applications, due to manufacturing and use reasons, often deviate from the Taylor principle, such as for large holes, with full plug gauge through the gauge, bulky, allowing the use of incomplete plug gauge; Ring gauge pass gauge is not easy to check the crankshaft, allow to use snap gauge instead.
We focus on micro precision, is a professional precision parts size pneumatic measurement equipment manufacturer, if you
Billion leride Equipment interested, welcome to click on our online customer service for consultation, or directly call the national unified service hotline
400-682-7787. We look forward to your call!

