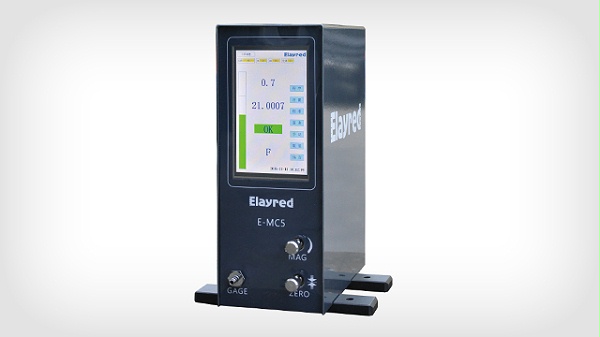
aerometerThe magnification and zero position need to be adjusted frequently during use. After a period of use, a variety of failures will occur, which requires troubleshooting to restore the original function and performance. The adjustment of various performance indicators of the measuring instrument is mostly carried out in the production process, and its premise is that the parts of the measuring instrument are not used, the air source meets the requirements, and the verification tool is standard. Yileride continues to deepen the field of precision parts size pneumatic measurement, independent research and development of air momentum instrument, pneumatic measurement core components, pneumatic probe selected German steel, to ensure the probe wear resistance and long life.
1Adjustment of indicating error
The main factors that affect the error of the buoy gas gauge are taper glass tube, working pressure, air leakage and probe.
The shape of the taper glass inner cavity is the key factor that determines the error of the measuring instrument. Especially the taper glass tube processed by grinding process, the inner cavity contour error is generally relatively large.

When detecting the indication error of the gas momentum meter, the reference ratio of the meter is adjusted between the upper and lower reference points, and the measurement gap corresponding to the two reference points is given by the micro-moving table or different measuring blocks. If the air leaks from the top end of the taper glass tube to each joint of the probe and the connecting pipe, it will actually increase the measurement gap value and change the indication error of the measuring instrument. Therefore, it should be carefully checked whether the taper glass tube is tilted, whether the glass tube gland is not pressed tightly, whether there is a gap at the pressing of the joint, and whether the distribution chamber is leaky due to loose tissue.
Because the standard axial probe is often zero, the end face will be worn, which makes the nozzle rounded Angle decrease, causing the middle error in the effective range of the measuring instrument to be positive. At this time, it should be corrected.
2Adjustment of maximum magnification
For the magnification valve, it is necessary to pay attention to whether there is dirt such as chips in the screw hole in the distribution chamber, whether the screw hole is not processed to the depth, whether the screw hole end face is not perpendicular to the screw axis, or the flatness is poor, and the screw thread part of the magnification screw is too long.
3Adjustment of the maximum measurement gap
If the maximum ratio of the measuring instrument can meet the requirements, the main factor affecting the maximum measuring gap of the measuring instrument is the leakage of air inside the measuring instrument and the connecting pipe and joint.
4Adjustment of inlet pressure characteristics
The main factor affecting the inlet pressure characteristic of the gauge is the pressure characteristic of the regulator.
5Adjustment of buoy stability
The indicated stability of the aerostat is the stability of the buoy. The main factors that affect the stability of the buoy are the shape of the buoy, the irregular air leakage in the gas path and the vortex generated at the throttle valve of the gas path. The buoy is not round, the outer surface has burrs and bumps, the shape and the inner cavity are not coaxial, which will cause the buoy to rotate, swing and tilt, and the buoy should be replaced at this time.
6The adjustment of the change of multi-tube indicator value
The factors that affect the change of multi-tube indicator value are too tight fit of zero valve sleeve and too high stiffness of zero spring.
7Adjustment of indicating value stability
The main factors that affect the stability of the indicator are air leakage of the connecting pipe and the connecting place, too small outer diameter of the sealing ring on the power screw, too loose thread fit and too loose thread fit of the zero screw. The air source is too dirty, and the filter in the air path has not been cleaned for a long time, resulting in too much oil and water in the air flowing through the meter. When conducting a long-term indicator stability test, oil dirt in the air accumulates on the baffle under the nozzle(That is, fast or fast)On, the longer the time, the more accumulation, which is equivalent to the gradual reduction of the measurement gap, the value of the meter is bound to change.
8Indicator variation and response time adjustment
The value variation of the measuring instrument is abnormal, mainly to see whether the regulator is normal, and whether there is a large dirt into the regulator or the measuring instrument.
Billion lerideLocated in Suzhou Industrial Park, we develop and manufacture high-precision testing equipment and industrial automation control. Focusing on micro-precision, we provide high-tech measuring equipment and technical services for home appliances (compressors), automotive, aerospace (aerospace), precision machining, semiconductor manufacturing and other industries. Support hardware and software development/design/Manufacturing one-stop non-standard customization, adhere to iterative research and development to continuously improve product accuracy and stability.
Professional analysis! Millired tells you the measurement principle and advantages of the gas meter
What are the advantages of a gas meter?